
The thought of removing old wallpaper to apply a fresh coat of paint can be daunting. The process is often time-consuming, labour-intensive, and costly. The good news is, you don’t have to go through the hassle of tearing it down. Wallpaper painting for homes offers a practical, affordable solution that not only saves you time and money but also delivers beautiful results, especially in moisture-prone areas like bathrooms and kitchens.
But when you decide to paint over wallpaper, it’s essential to use the right materials, techniques, and preparation to ensure a long-lasting, smooth finish that will withstand the humidity and moisture typically found in these areas. This guide will walk you through the process of painting over wallpaper in bathrooms and kitchens, focusing on moisture resistance and providing expert tips on how to get the best possible outcome.
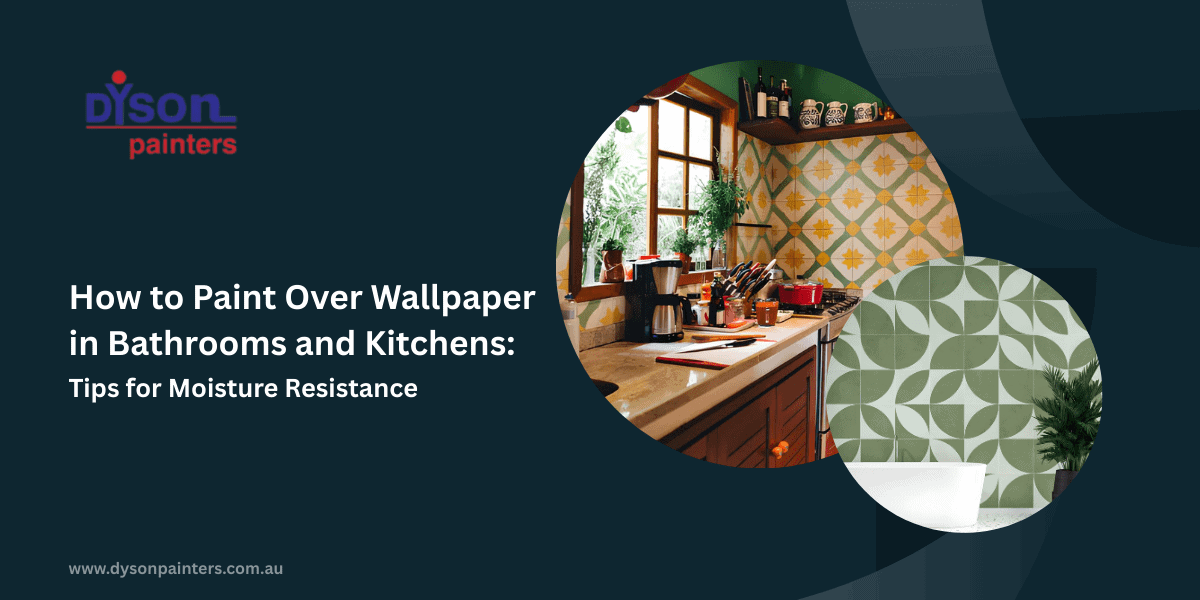
Preparing the Walls for Wallpaper Painting
Painting over wallpaper in high-moisture areas may seem like a temporary solution, but it offers numerous advantages that make it an attractive option. Let’s take a closer look at why this method is a great choice for homeowners.
1. Cost-Effective Alternative to Wallpaper Removal
Wallpaper removal can be both expensive and labour-intensive. In many cases, it requires professional help, particularly if the wallpaper is stubbornly stuck to the walls. The cost of labour, materials, and disposal adds up quickly. Wallpaper painting offers a more affordable alternative, especially when you’re looking to save on renovation costs.
By painting over wallpaper, you can update the look of your bathroom or kitchen without spending a fortune. You’ll only need to purchase primer, paint, and basic painting tools, which is a far cheaper option than hiring someone to remove the wallpaper, fix damaged walls, and repaint the entire space.
2. Faster and Less Messy Than Removing Wallpaper
Removing wallpaper is a messy and lengthy process. You’ll often find yourself scraping, steaming, and cleaning up glue residue, which can create more mess than you bargained for. In contrast, painting over wallpaper is a relatively clean and quick project. With the right techniques, you can start and finish painting over wallpaper within a day or two, minimising disruption to your daily life.
3. Protects the Walls From Damage
In some cases, removing wallpaper can cause damage to the underlying walls, particularly if the wallpaper is old or the adhesive has been on for years. The process can peel off layers of drywall or plaster, leaving you with uneven surfaces that require additional repairs. Best wallpaper painting methods, however, can preserve the integrity of your walls while giving your space a fresh, updated look.
4. Non-Permanent Solution
If you’re living in a rental property or simply prefer not to make permanent changes to your home, painting over wallpaper can be an excellent non-permanent option. This allows you to update your space without the commitment of entirely removing the wallpaper and permanently altering your walls. Additionally, when you move out or want to update your home again, you can easily paint over the walls again or change the design without leaving any lasting damage.
Preparing the Walls for Wallpaper Painting
To ensure a smooth, durable finish when painting over wallpaper in your bathroom or kitchen, the preparation phase is critical. Without the proper preparation, you may experience peeling, bubbling, or unsightly lines. Here’s how to properly prepare the walls before painting.
1. Inspect the Wallpaper’s Condition
Before proceeding with the painting process, it’s essential to inspect the wallpaper for any damage. Look for areas that are loose, peeling, or have stains. Wallpaper that is already damaged may not hold the paint well and could cause issues later. If the wallpaper is already lifting in certain areas, you’ll need to address these problems first before painting over it.
If you find small tears or loose sections, carefully patch them with wallpaper adhesive and use a wallpaper scraper to smooth them out. You may also want to apply a primer to these areas for extra bonding strength.
2. Clean the Wallpaper Thoroughly
Bathrooms and kitchens are two of the most moisture-prone areas in the home, which means your wallpaper may accumulate grease, soap scum, mildew, or dust. Before you begin painting, thoroughly clean the wallpaper to remove any buildup. You can clean the surface using a gentle detergent diluted with water and a soft cloth or sponge. Be gentle to avoid damaging the wallpaper.
If you notice mould or mildew growth, you must treat the affected areas with a solution of one part white vinegar and one part water. For stubborn mould, you can also use a store-bought mould remover. After cleaning, let the surface dry completely before moving on to the next step.
3. Smooth the Surface
Wallpaper, especially textured wallpaper, can create an uneven surface that will impact the final finish of your paint job. To avoid this, use a wallpaper scraper or sanding block to smooth out any bumps, seams, or raised edges. If your wallpaper has any deep texture, consider using a sanding sponge to make the surface as smooth as possible before applying primer.
If the seams of the wallpaper are peeling, press them down with wallpaper adhesive to ensure that the paint won’t lift them later on. For a more even surface, use a joint compound to fill in any gaps or rough patches on the wallpaper.
4. Apply a High-Quality Primer
Priming is the most crucial step in preparing to paint over wallpaper, especially in bathrooms and kitchens. The primer helps the paint adhere to the wallpaper while sealing any patterns, textures, or seams underneath. Moisture-resistant primer is a must for bathrooms and kitchens to prevent mould and mildew growth.
When choosing a primer, make sure it’s designed for use in high-moisture areas. Use a brush to apply primer to the edges and corners, and a roller for larger areas. Make sure you cover the entire surface, including any seams or imperfections. Allow the primer to dry completely, usually for 4 to 6 hours, before applying paint.
Choosing the Best Paint for Wallpaper in High-Moisture Areas
When painting over wallpaper in bathrooms and kitchens, not all paints are created equal. You’ll need a paint that can withstand the humidity and moisture these spaces are exposed to. Here’s what to look for:
1. Moisture-Resistant Paint
The most important consideration when choosing paint for bathrooms and kitchens is moisture resistance. The paint you select must be capable of standing up to the high levels of humidity that are typical in these areas. Acrylic or latex paints are excellent choices for painting over wallpaper because they are breathable and resistant to mildew, which helps protect the walls from moisture-related damage.
Additionally, look for paints that specifically mention mildew or mould resistance on the label. These paints typically contain additives that prevent mould and mildew from growing on the surface, which is particularly important in the high-moisture conditions of bathrooms and kitchens.
2. Finish Matters: Satin or Semi-Gloss
When it comes to finishes, you’ll want to avoid matte or flat paint in bathrooms and kitchens, as they tend to absorb moisture. Instead, opt for satin or semi-gloss finishes. These finishes are more reflective and help repel moisture, making them ideal for high-humidity spaces. Satin and semi-gloss finishes also have the added benefit of being easier to clean, which is particularly useful in kitchens where grease and food splatters are common.
3. Breathability
One of the primary advantages of using latex-based paints for wallpaper painting is their breathability. Breathable paints allow moisture to escape from the walls, preventing trapped humidity from causing bubbles, cracks, or peeling. Non-breathable paints can trap moisture between the paint and wallpaper, leading to premature wear and damage.
Step-by-Step Guide for Wallpaper Painting in Bathrooms and Kitchens
Now that you’ve prepared the walls, gathered your materials, and chosen the right paint, here’s a detailed step-by-step guide to help you achieve a flawless finish.
Step 1: Gather Your Supplies
Before starting, ensure you have everything you need:
- Wallpaper scraper
- Mild detergent and water
- Sandpaper block or smoothing tool
- Moisture-resistant primer
- Moisture-resistant paint (satin or semi-gloss finish)
- Paint roller, brush, and painter’s tape
- Drop cloths or plastic sheeting to protect your floors
Step 2: Clean and Prep the Walls
As discussed, cleaning your wallpaper is crucial for achieving a smooth finish. Use the appropriate cleaning solution for any mildew or dirt buildup, and let the wallpaper dry completely before moving on.
Step 3: Apply Primer
Once your walls are clean and dry, apply a moisture-resistant primer. This is especially important in bathrooms and kitchens, where humidity is high. For larger areas, use a roller, and for the edges and corners, opt for a brush. Make sure you cover every part of the wall, including seams and corners.
Step 4: Paint the Walls
After the primer has dried, it’s time to paint. Use a high-quality roller to apply the first coat of paint. Start from the top of the wall and work your way down, using long, even strokes. Once you’ve covered the entire surface, let the first coat dry, and then apply a second coat for optimal coverage.
Step 5: Touch Up and Final Steps
After the second coat has dried, inspect the walls for any areas that may need touching up. Use a small brush for any imperfections around the edges. Once you’re satisfied with the finish, remove any painter’s tape from the edges to reveal crisp lines.
Troubleshooting Common Problems
1. Bubbling or Peeling Paint
If you notice bubbles or peeling paint after applying it to wallpaper, it could be due to insufficient surface preparation or moisture trapped behind the wallpaper. To fix this, scrape off the loose paint, reapply primer, and repaint.
2. Wallpaper Bleeding Through Paint
If the wallpaper’s pattern or colour bleeds through, likely, the primer wasn’t strong enough. To resolve this, use a stain-blocking primer to cover the pattern and prevent it from showing through the paint.
3. Mildew or Mould Issues
Moisture-prone areas are particularly susceptible to mould and mildew. To prevent this, use mildew-resistant paints and primers. If mildew appears, clean the surface with a mildew remover and reapply the paint.
Conclusion
Wallpaper painting for your home is a great way to refresh the look of your bathroom or kitchen without the hassle of wallpaper removal. By using the right materials and following proper preparation steps, you can achieve a durable, moisture-resistant finish that will last for years. Whether you’re looking for a cost-effective update or simply need a quick renovation, painting over wallpaper is an excellent option for homeowners.
Remember, when painting over wallpaper in high-moisture areas like bathrooms and kitchens, prioritise moisture-resistant primers and paints. A satin or semi-gloss finish, along with proper surface preparation, will ensure the best results. With these expert tips and techniques, you can give your walls a fresh new look without the time and expense of traditional wallpaper removal.
Frequently Asked Questions
1. Can you paint over wallpaper in bathrooms and kitchens?
Yes, you can paint over wallpaper in bathrooms and kitchens, but it’s essential to prepare the surface properly. Use a moisture-resistant primer and paint with a satin or semi-gloss finish for best results in high-humidity areas.
2. What type of paint is best for wallpaper painting in high-moisture areas?
For high-moisture areas like bathrooms and kitchens, opt for moisture-resistant acrylic or latex paint with a semi-gloss or satin finish. These paints are durable, mildew-resistant, and easy to clean.
3. How do I prepare wallpaper before painting?
Clean the wallpaper thoroughly, remove any loose edges, smooth out the surface, and apply a moisture-resistant primer. Ensure the wallpaper is in good condition before painting for the best results.
4. Can I paint over textured wallpaper?
Yes, you can paint over textured wallpaper, but make sure to smooth out any bumps or raised areas. Sand or use a smoothing tool to level the surface before priming and painting.
5. How long should I wait between applying primer and paint?
Allow the primer to dry completely, usually 4-6 hours, before applying paint. Make sure the primer is fully set to ensure proper adhesion and avoid any peeling or bubbling after painting.
Rely on Experts for Kitchen and Bathroom Painting
If you’re tired of outdated wallpaper in your high-moisture areas, painting over it can be a cost-effective and straightforward solution. With the right techniques and materials, you can give your bathroom or kitchen a fresh, modern look in no time.
At Dyson Painters, we specialise in wallpaper painting for homes and provide expert guidance to ensure your walls not only look great but also stand up to moisture and humidity. Whether you’re a DIY enthusiast or looking for professional assistance, we’ve got you covered.
Contact us at 0420-213-214 or email us at admin@dysonpainters.com.au for a free consultation or if you have any questions about wallpaper painting for your home. Let us help you achieve beautiful, long-lasting results that will enhance your space for years to come. Take the first step towards a more vibrant, refreshed home today. Reach out to our expert team now and get started on your project!
Also Read:
Can You Paint Over Wallpaper? Learn From Professional Painters
Should You Go for Home Painting or Wallpaper: Make Your Choice


